Optional Arduino Lab: Joystick
Goal: Create a project using the analog joystick.
Circuit Setup
- Materials
- 1x Arduino
- 1x Joystick
- Other components
- Setup
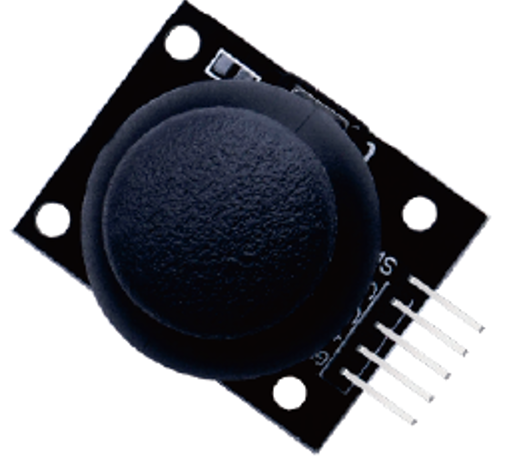
- Joystick
- GND - Ground connection
- +5V - 5V connection
- VRx - analog voltage value between 0V and 5V giving you the relative x position
- VRy - analog voltage value between 0V and 5V giving you the relative x position
- SW - pushbutton switch, click in to press
- Joystick
Lab Instructions
- Project must use an analog joystick to control some other component. Here are some ideas:
- Use it to control the brightness of an LED.
- Use it to color mix an RGB LED.
- Use it to control which LED in a sequence of LEDs is lit up.
- Use analogRead() to determine the x and y position of the joystick.
- Remember: analogRead() returns a value between 0-1023
- The midpoint is ~512.
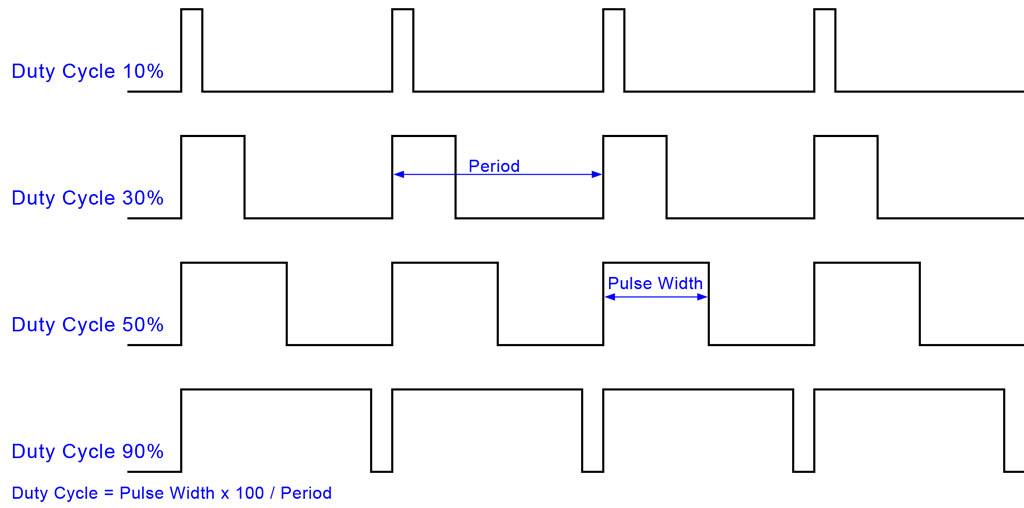
- To control the brightness of the LED, we will use a new function called analogWrite().
- A technique for getting pseudo-analog results with digital means. Does not write a true analog value.
- Digital control is used to create a square wave (signal switched between on & off).
- Reduces average power by pulsing a voltage at a very fast rate. Used to control intensity like the speed of motors or brightness of LEDs.
- Use analogRead() to read a value from the joystick and analogWrite() to write a value to an LED.
analogWrite(pin, value)- sends a PWM wave only works on pins with tilde ~ (pins 3, 5, 6, 9, 10, 11)pin: the Arduino pin to write to.value: the duty cycle: between 0 (always off) and 255 (always on).
- Stretch Goal: Use digitalRead() to determine whether or not the switch is pressed.
- Configure pin like so: pinMode(SW, INPUT_PULLUP)
- Switch is pressed when digitalRead(SW) == LOW