Arduino Lab 6: Theremin
Background: A theremin is an electronic musical instrument controlled without physical contact by the performer. See a performance here. We are going to make a fairly rudimentary version of this using a photocell. This project falls more in the realm of wellness. It's fun to play and you can create all sorts of sounds!
Goal: Create a theremin using a photocell.
Circuit Setup
- Materials
- 1x Photocell
- 1x 10 kOhm Resistor
- 1x Piezoelectric speaker (buzzer with bare contacts and circuit board material on the underside, looks different than below).
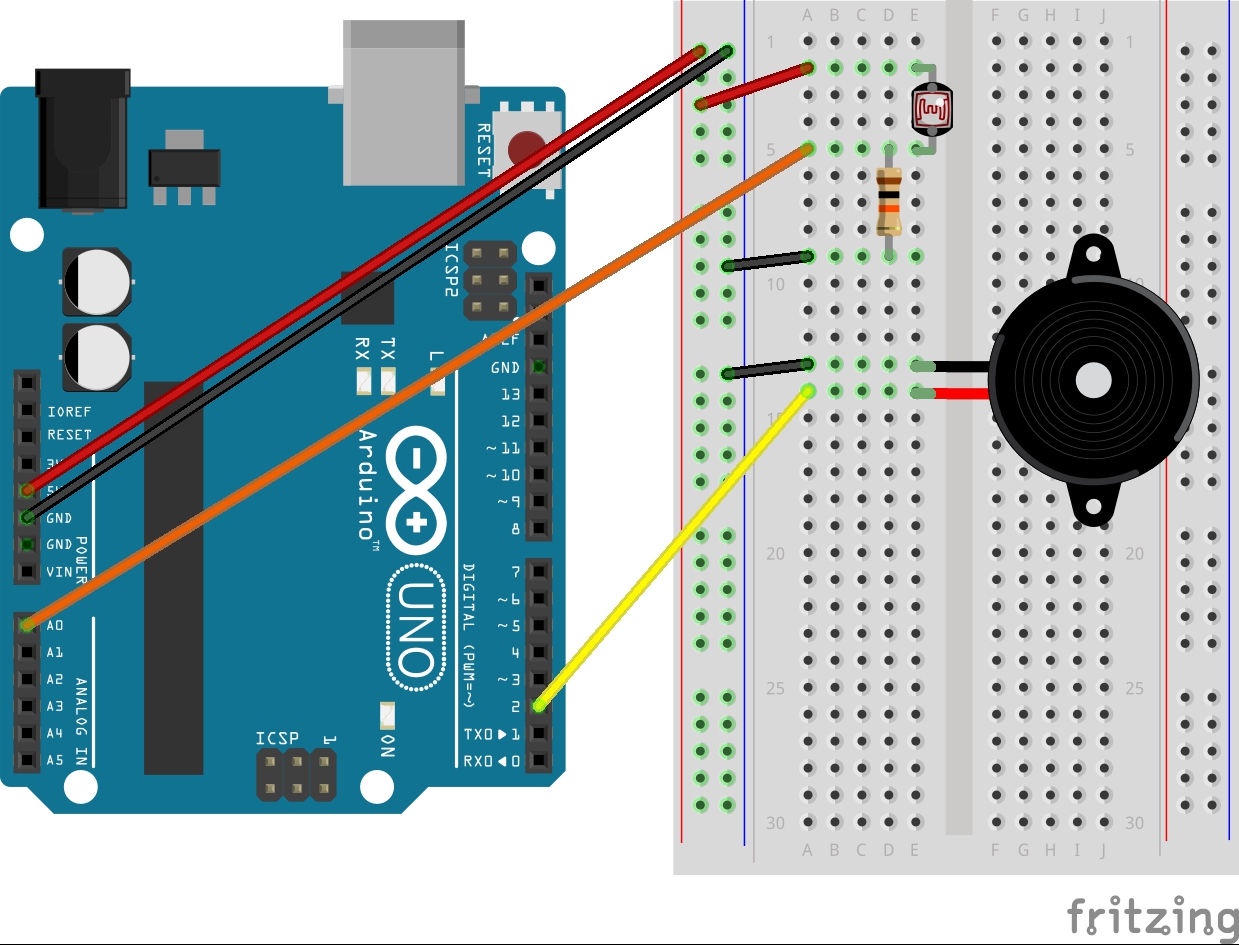
- Setup
- Connect photocell between 5V and A0.
- Connect resistor between A0 and GND.
- Connect “+” side of speaker to digital pin 2.
- Connect other side of speaker to GND.
Lab Instructions
- Configure serial port to be used.
- Use analogRead() to read analog voltage in circuit.
- Provides a value between 0-1023 corresponding to a voltage.
- Store this value to a variable.
- Use the analogRead() value to play a sound using the tone() function:
- tone(pin, freq) – plays a note at the specified frequency.
- pin – the pin we want to play the sound from (pin 2).
- freq – the frequency of the note we want to play.
- Below describes the frequency ranges of a keyboard. You may need to scale or adjust the analogRead() value to play good audible frequencies.
- The notes on a piano range in frequency from 32 to 4186 Hz.
- https://en.wikipedia.org/wiki/Piano_key_frequencies
- tone(pin, freq) – plays a note at the specified frequency.